Friday, December 23, 2016
Saturday, July 2, 2016
Bridal Shower for Jennifer

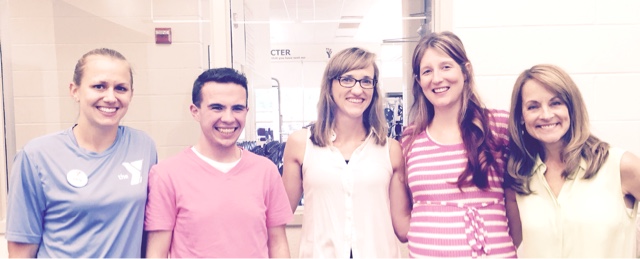
A beautiful bridal shower for a sweet co-worker! I was so happy to set-up for this shower for Jennifer, one of our trainers at the YMCA, and I love the turn out. I think she did too!

Sunday, June 26, 2016
Brooke and Daniel's Big Day
This is Brooke and Daniel, and I'm so happy I got to play a part in their big day as their reception planner/coordinator!
They had a great looking wedding party!
Brooke chose to go with a gray and yellow theme, which worked perfectly for this time of year!


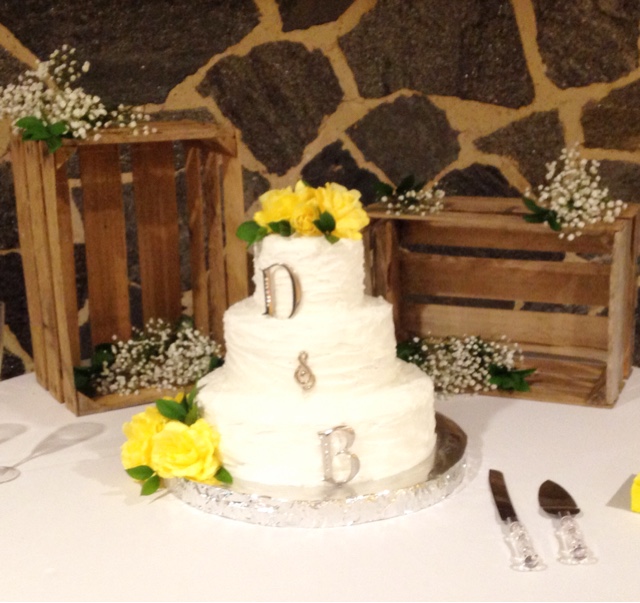
The cake was gorgeous! I think adding the crates behind gave it the perfect touch!

Wednesday, May 18, 2016
A Mother's Day Morning
Gonna be honest.... I TOTALLY forgot that I never did this post! I had all my pictures on here ready to go, but never finished it. (Crazy me!)
So this post is about this past Mother's Day (I'm only like 3 weeks late)! But I think it's still worth sharing!
I decided to go with a "Farmer's Market" theme after seeing some really cute flower arrangements that incorporated vegetables and finding this "Farmers Market" bag at TJ Maxx.
The picture above is of our kitchen counter where I set up all of the food!
I thought this was really cute! This little "Flowers & Garden" bucket came from Target and all I did was add a silver plate charger that I already had and Bam! It's a cute serving platter topped with doughnuts and strawberries!
And here is the table! I used a simple lace tablecloth with a fabric table runner with white plates. On each plate I placed a small faux greenery plant (I've had these for years!) And then there's the centerpiece! I got this idea from a post on Instagram that I saw from Country Living Magazine!
I used orange tulips and sunflowers which were bright and vibrant against a neutral background and that greenery is...
Beets!
Isn't that cool! I had wanted to put beets and carrots so there would be a variety of color, but I couldn't find any good carrots haha! So I used two different kind of beets, and in this clear jar, it allows for interest at both the top and bottom of this centerpiece!
Also on the plates I made these little place cards by just cutting plain white cardstock to size and then writing in the names and cute floral detail. Simple and easy!
I also made this banner, which perfectly matched my theme! I found these cute gift tags at TJ Maxx for like $1.49, and I thought they were so pretty!
Here's a close up:
I love them! So instead using them for their intended purpose, I decided to string them and turn it into a cute, encouraging, garden-themed banner! And this is something that can be used anytime, which is why it's still haning up in our dining room! :)
To me, little touches like that are just as, if not more, important than the bigger decorating items, and I love taking the time to focus on those little details!
I think Mama was pretty happy with her Mother's Day Morning!
Thanks for checking this out!
Be on the look-out for some other posts that are soon to come! I recently got a few new home decor items that I can't wait to style and blog about!
Also, we've got a Simplicty Event this weekend! I'll be helping set-up and decorate for a great friend's wedding, and I know it's going to look great! A post about it should be up over the next few weeks! And we have another event at the end of June that I'll be sharing about as well!
Lots of exciting things are going on, and I can't wait for you to see the outcomes!
:)
Keep it Simple!
Saturday, May 14, 2016
A Shower for Baby Ruby
Angie Beccue is our Wellness Director at the YMCA where I work, and she is a great boss. This past week, we hosted a sweet baby shower for her and baby Ruby!
Here are the results:
Here are the results:

For this shower, I didn't want to do the traditional baby, baby pink and the rattles and baby bottles (which are all fine and cute, but I figured she'd probably have other showers from family and friends that would be using those), so I found this lovely fabric at Hobby Lobby, and used it as my "jumping off point".
I thought it was perfect for a shower with the various shades of pink and accents of yellow, black and orange.
For the table's centerpiece, I used these gorgeous faux florals! The three large pink peonies came from Michael's Craft Store, and the other smaller flowers and greenery came from the flower shop at Real Deals in Jefferson, Ga. We got them at a great deal because the store was closing! (Gotta love a 90% off sale!!!)
Down the rest of the table, I used hot pink carnations in small bud vases, which matched beautifully with the fabric table runner.
I love the image above! We have multiple potted trees throughout the facility at the Y, and I asked one of our managers to move two of them back to the room where we were going to host the shower. They made the entire space! I used the small hanging glass terrariums that belong to a great co-worker, Emily Young, with carnation buds in some and baby breath in others.

This was the drink table! And as much as I want to take credit for that pretty R, I can't. My mom is the glitter queen!The "R" is made of cardboard and I bought it at Michael's for like 80 cents. I tried to fix it myself, but glitter gives me anxiety! (Hahaha) So my mom fixed this and then I added it to the chalkboard frame. (Good Job Mama! :) )

Angie Loved it because it really personalized the shower for her baby!

I fixed this chalkboard sign after I found the cutest little cards on another blog. And I didn't save the name of that blog, and I cannot find it now, but, to that blogger, Thanks! Your cards are super cute!
Here's a Picture of them:
Here's a Picture of them:
(Sorry for the quality!)
All in all, it was great time! Congratulations to Angie and Andrew, and we all can't wait to meet baby Ruby!!!

Wednesday, April 27, 2016
DIY (Distressing It Yourself!)
I love frames whether picture frames, window frames, mirror frames, I love decorating with them all, especially when they are antique/distressed. So, this post is going to show you how to turn basic black 8x10 frames that you can get at any dollar store into beautiful distressed décor pieces.
I saw a video on Facebook the other day of a lady doing this, and I had to give it a try to see if it actually worked, and it does! And it's very simple.
All you need is:
1) Paint
2) Frames
3) Bar Soap
Yes, a bar of soap. I thought it was crazy, too. But it does work.
Take the glass and back out of your frame (if it has it) and then take your bar of soap and rub it all over the frame. Make sure you cover the corners and any other areas where you want it to look extra worn/distressed very well.
After you covered your frame with soap, paint the entire frame. I used a light grey chalk paint for mine, but you could use anything! I think using some colors like a bright yellow or red would be very pretty to do this with if you wanted your frames to make more of a statement.
Make sure you cover it very well. It will look awful at this step but that's ok! When I did the first one (pictured below), I thought that this was going to be such a waste of time and materials, but believe me, it will look good at the end!
Let the paint dry for a few hours. Then, lightly scrape over the entire frame. You can use practically anything to scrape it. I used the end of my paint brush, the side of the glass that was in the frame, a pencil... anything works!
Just keep scraping until your happy with how it looks, and there you have it!
These can be used for their intended purpose of displaying pictures, or can be sat around or hung empty for décor in any space!
Happy Decorating!!!
Monday, March 28, 2016
Tara's Spring Wedding Shower
Sweet Success! Tara's shower was wonderful! I was so happy with how everything turned out for this event that we had at work! Tara is our Sports/Aquatics Director at the YCMA, and she is one of my favorite managers for sure! She'll be tying the knot with her man, Michael, in a couple of weeks, so I was so excited to plan her shower!
I didn't have a "theme" for the shower, but chose to use gold and aqua blue as my colors, which Tara loved!
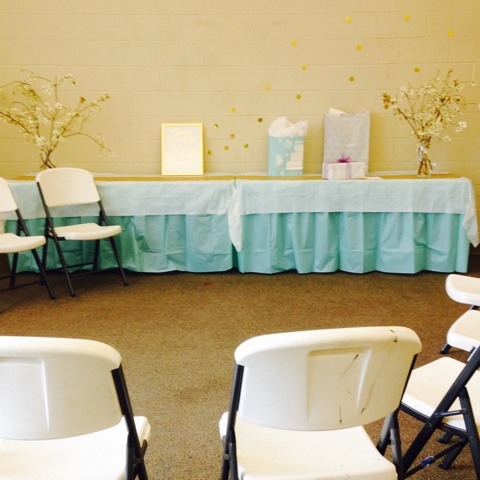
For the gift table I used aqua blue table skirts and white tablecloths with two gold sequined table runners.
On each end, I used live Dogwood and Apple Blossom Branches table for many reasons. 1) THEY'RE gorgeous! 2) They added some needed height. 3) They helped cover the not so pretty walls. 4) THEY'RE GORGEOUS! Thankfully, our dogwood tree is already in full bloom!

I thought this gold dot detail behind the gift table was super cute! I had bought a pack of large gold "dots" at Target a few months ago on clearance. I originally got them to string and hang up for Christmas, which I did, but I had a TON left over!
I thought taping them to the wall behind the gift table would be a neat detail and add some interest. I arranged them as if they were floating away from the frame that I bought for Tara.
.

What I thought was crazy, is that verse is what Tara's theme verse for her wedding! And I promise you I did not know that until the day of the shower! I love when things like that happen!
I decided to set up the bar in our Multi-Purpose Room for the food instead of setting up additional tables. Unfortunately, I didn't get any pictures of the food, which still blows my mind. I actually started to not even do this post because I didn't have the pictures, but nobody's perfect so I will do my best to describe what it looked like.
On the first tray in the picture of above, we had an assortment of fruit. On the large tray in the center of the bar we had small pimento cheese and chicken salad sandwiches, and on either side of it where you see the cake plates, we put the cupcakes that we had, which were SO CUTE! but loser me didn't get a picture of them. (sorry peeps).
I had gold sparkling cupcake liners around each of them, and I, with the help of a co-worker, made small cupcakes picks that said "Love" in gold script. Try to imagine them. They were just the cutest things!
For drinks, we had Tea and Lemonade
This banner turned out perfect! But it did not look like that originally. I had bought it at Party City, but the letters were stapled to silver fringe that did not match my aqua & gold theme, and it also wouldn't have allowed me to hang it the way I wanted to. So, I pulled out the staples and ran fishing line behind them to make them look like they were just floating.
Sorry, again, for not having some more better pictures for y'all! But, it was a great shower! Here's a few more pictures!
(I LOVED these napkins! :) )
Congratulations and Best Wishes to Tara and Michael!
And thanks for being awesome!
And thanks for being awesome!
Subscribe to:
Comments (Atom)


